Documentation Index
Fetch the complete documentation index at: https://wpay-feat-edp-guide.mintlify.app/llms.txt
Use this file to discover all available pages before exploring further.
Click to Pay is the better way to pay online – featuring advanced
payment technology built on secure remote commerce industry standards.
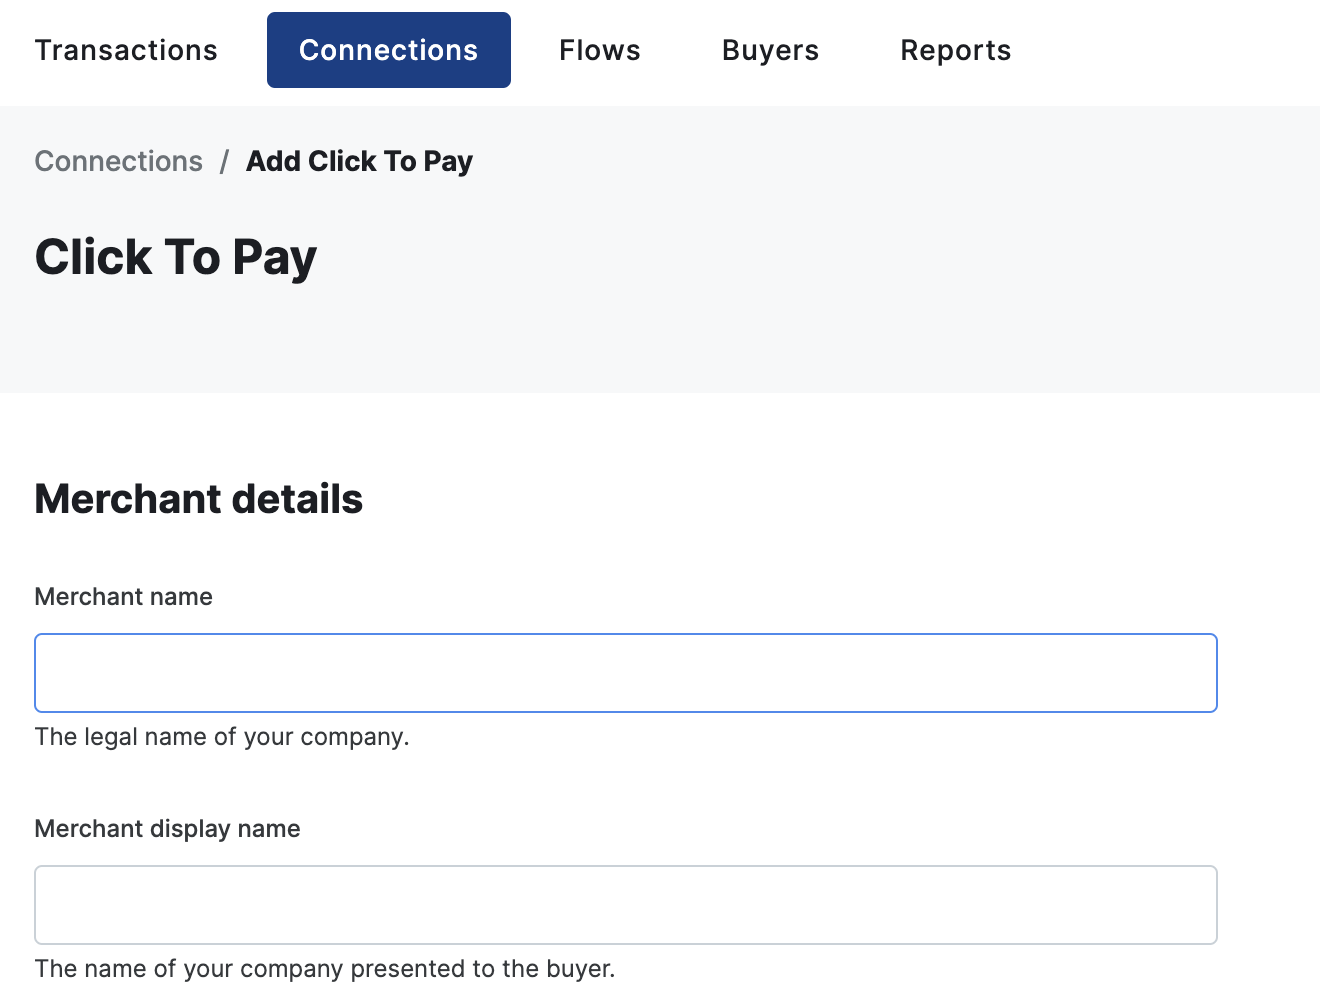
Merchant setup
In order to process Click to Pay payments you will need to register as
a Digital Payments Application (DPA). You can set up Click to Pay in the
dashboard which will automatically register and configure your DPA with Mastercard.
Prepare the server
Before you can load Click to Pay with Secure Fields into your checkout, you will
need to generate a checkout session via the API. This is made easy with our
server-side SDKs.
Install a server-side SDK
Use the package manager in your preferred programming language to install our
server-side SDK. Generating a checkout session can only be done server side and
we do not recommend doing this client side as it will expose your API key to your
customers.
npm install @gr4vy/node --save
# or: yarn add @gr4vy/node
Initialize the SDK client
Next, initialize the SDK with the ID of your instance and the private key.
const fs = require("fs");
const { Client } = require("@gr4vy/node");
// or: import { Client } from "@gr4vy/node";

const key = String(fs.readFileSync("./private_key.pem"));

const client = new Client({
  gr4vyId: "[GR4VY_ID]",
  privateKey: key,
});
This SDK needs to be initialized on your server-side. Please do not expose
your private key to your client-side code.
private_key.pem that is kept in the same folder next to the code. You could
store this key in an environment variable or a secure vault.
To learn more about our API authentication, and how to generate a bearer token
for use without our SDKs, please see our more extensive authentication
guide. Create a checkout session
With the SDK installed, you can use it to create a checkout session for use with
Click to Pay.
const response = await this.newCheckoutSession();
Create your checkout
With your checkout session ready, it’s time to start creating a card form that
can support Click to Pay.
Our frontend integration is called Secure Fields and it essentially wraps each
of your credit card input fields in a secure element, keeping you PCI-compliant
and allowing for seamless integration with Click to Pay.
For more information on Secure Fields, please see our detailed
guide which will cover all the available
options, events, and theming customizations available. Install Secure Fields
There are three ways to install Secure Fields for use with Click to Pay:
either as a React library, a Node library or straight off our CDN.
npm install @gr4vy/secure-fields-react --save
# or: yarn add @gr4vy/secure-fields-react
Initializing secure fields
With Secure Fields installed it’s now possible to initialize the connection
to your instance. It expects a checkout session ID you created earlier.import { SecureFields } from "@gr4vy/secure-fields-react";
<SecureFields
gr4vyId="[GR4VY_ID]"
environment="sandbox" // or "production"
sessionId="[CHECKOUT_SESSION.ID]"
// enable debugging
debug
>
<Form />
</SecureFields>
import {
  CardForm,
  CardNumber,
  ExpiryDate,
  SecurityCode,
  useSecureFields
} from '@gr4vy/secure-fields-react'

const secureFields = useSecureFields()

{/* This card form will automatically hide  */}
<CardForm
  onVisibilityChange={(visible: boolean) => {
    console.log('Card form visibility changed. Visible', visible)
  }}
>
  <div id="card-form" className="max-w-xs">
    {/* You can add your own fields as well as secure fields */}
    <label for="cc-holder-name">Name</label>
    <input id="cc-holder-name" placeholder="Name on the card" />

    {/* These are fields that will become secure fields */}
    <label htmlFor="cc-number">Card number</label>
    <CardNumber styles={styles} />

    <label htmlFor="cc-expiry-date">Expiry date</label>
    <ExpiryDate styles={styles} />

    <label htmlFor="cc-security-code">Security code</label>
    <SecurityCode styles={styles} />

    <button onClick={() => secureFields.submit()}>Pay</button>
  </div>
</CardForm>
Add Click to Pay
Next, add the Click to Pay components to show and hide their UI on demand.
import {
  ClickToPay,
  ClickToPaySignIn
} from '@gr4vy/secure-fields-react'

 {/* The main Click to Pay component */}
<ClickToPay
  srcDpaId: '{SRC_DPA_ID}',
  dpaName: '{DPA_NAME}',
  dpaLocale='en_AU'
  cardBrands={['mastercard', 'visa', 'american-express']}
  consentCheckbox='#click-to-pay-consent-checkbox'
  learnMoreLink: "#click-to-pay-learn-more-link",
  // email: 'john@example.com', // optional: define a Click to Pay user e-mail instead of capturing it with the sign-in form
  /* mobileNumber: {
    countryCode: "61",
    phoneNumber: "491570159"
  }, */ // optional: define a Click to Pay user phone instead of capturing it with the sign-in form
/>

 {/* An optional sign-in with email or phone for Click to Pay would go here */}
<ClickToPaySignIn data-testid="sign-in">
  <label>Access your Click to Pay stored cards</label>
  <input type="text" className="email" ref={ref} />
  <button onClick={() => secureFields.clickToPay.signIn({ email: ref.current.value })}>
    Sign in
  </button>
</ClickToPaySignIn>

<CardForm>
  {/* ... */}

  <input type="checkbox" id="click-to-pay-consent-checkbox" />
  <label htmlFor="click-to-pay-consent-checkbox">
    Store my card with Click to Pay <a href="javascript:void(0)" id="click-to-pay-learn-more-link">Learn more</a>
  </label>

  {/* ... */}
</CardForm>
Secure Fields will automatically display and hide the Click to Pay Component, the sign in form, and your card form, based on the
status of Click to Pay.
onCardVaultSuccess property
on the SecureFields component to create a transaction.<SecureFields onCardVaultSuccess={async () => {
// call your API
}}
>...</SecureFields>
For more information on Secure Fields, please see our detailed
guide which will cover all the available
options, events, and theming customizations available. npm install @gr4vy/secure-fields --save
# or: yarn add @gr4vy/secure-fields
When using the CDN the latest version of the library is always pulled straight
from the server for every request.
Initializing secure fields
With Secure Fields installed it’s now possible to initialize the connection
to your instance. It expects a checkout session ID you created earlier.import SecureFields from "@gr4vy/secure-fields";
// set up the environment
const gr4vyId = "[GR4VY_ID]";
const environment = "sandbox"; // or "production"
const sessionId = "[CHECKOUT_SESSION.ID]";
// initialize the SDK
const secureFields = new SecureFields({
gr4vyId,
environment,
sessionId,
});
// enable debugging
secureFields.setDebug(true);
<form id="cc-form">
  <!-- You can add your own fields as well as secure fields -->
  <label for="cc-holder-name">Name</label>
  <input id="cc-holder-name" placeholder="Name on the card" />

  <!-- These are fields that will become secure fields -->
  <label for="cc-number">Card Number</label>
  <input id="cc-number" />

  <label for="cc-expiry-date">Expiry date</label>
  <input id="cc-expiry-date" />

  <label for="cc-security-code">Security Code</label>
  <input id="cc-security-code" />

  <input type="submit">Pay</button>
</form>
// Add fields using a querySelector compatible string
const number = secureFields.addCardNumberField("#cc-number", {
  placeholder: "Enter card number",
});

const securityCode = secureFields.addSecurityCodeField("#cc-security-code", {
  placeholder: "Enter CVV",
});

// Alternatively an HTML element can be passed directly
const expiryDate = secureFields.addExpiryDateField(
  document.querySelector("#cc-expiry-date"),
  {
    placeholder: "Enter expiry date",
  }
);
<input> fields for the card form with a new
PCI secure field. It’s worth noting that we did not attach a secure field for
the cardholder name, instead, this field will remain a regular HTML inputEvery field that Secure Field is attached to needs to be an HTML element. In
this case, we attached the fields to <input> fields. The fields can be
attached to any element using a querySelector-compatible query.
Add Click to Pay
Next, add a placeholder component to your form so we know where to render the
Click to Pay component. Additionally, add a checkbox to allow a customer not
already enrolled to determine if they want to share the card data with Click to
Pay or not. Finally, add the rest of the Click to Pay components to show and hide
their UI on demand.<div id="click-to-pay"></div>
<!-- Small form to let users sign in with Click to Pay, hidden by default -->
<div id="click-to-pay-sign-in" style="display: none;">
<label>Access your Click to Pay stored cards</label>
<input type="text" id="phoneOrEmail" />
<button id="signInButton">Continue</button>
</div>
<form id="cc-form" style="display: none;">
<!-- ...Secure fields inputs added previously -->
<input type="checkbox" id="click-to-pay-consent-checkbox" />
<label for="click-to-pay-consent-checkbox">
Store my card with Click to Pay. <a href="javascript:void(0)" id="click-to-pay-learn-more-link">Learn more</a>
</label>
<input type="submit">Pay</button>
</form>
<script>
var phoneOrEmail = document.querySelector('#phoneOrEmail')
var signInButton = document.querySelector('#signInButton')
signInButton.addEventListener('click', function () {
clickToPay.signIn({ email: phoneOrEmail.value })
})
</script>
const clickToPay = secureFields.addClickToPay('#click-to-pay', {
  srcDpaId: '{SRC_DPA_ID}',
  dpaName: '{DPA_NAME}',
  dpaLocale: 'en_AU',
  cardBrands: ['mastercard', 'visa', 'american-express'],
  consentCheckbox: "#cc-opt-in",
  learnMoreLink: "#click-to-pay-learn-more-link",
  cardForm: "#card-form",
  signIn: "#click-to-pay-sign-in"
  // email: 'john@example.com', // optional: define a Click to Pay user e-mail instead of capturing it with the sign-in form
  /* mobileNumber: {
    countryCode: "61",
    phoneNumber: "491570159"
  }, */ // optional: define a Click to Pay user phone instead of capturing it with the sign-in form
})
Secure Fields will automatically display and hide the Click to Pay Component, the sign in form, and your card form, based on the
status of Click to Pay.
<form>
element or a click of the submit button. You can then prevent the default
behavior and submit Secure Fields. This will instruct the fields to post the
card data (regular, or Click to Pay) to the API.document.querySelector('#cc-form').addEventListener(
"submit",
(e) => {
e.preventDefault()
secureFields.submit()
}
)
secureFields object to
listen to the card data being successfully, or unsuccessfully vaulted.secureFields.addEventListener(
SecureFields.Events.CARD_VAULT_SUCCESS,
() => {
// Make an API call to your server to complete the transaction
}
)
secureFields.addEventListener(
SecureFields.Events.CARD_VAULT_FAILURE,
() => {
// Handle the inability to store the card data
}
)
In the case of a single-page app, it might be useful to unload any of the event
listeners when the form is unloaded.
Create a payment
With the card data stored in the vault, you are now ready to create a
transaction on the server-side. To create a transaction you can pass the amount,
currency, as well as the payment method, in this case a checkout session.
const request = new TransactionRequest();
request.amount = 1299;
request.currency = "AUD";

request.paymentMethod = new TransactionPaymentMethodRequest();
request.paymentMethod.method = "checkout-session";
request.paymentMethod.id = "[CHECKOUT_SESSION.ID]";

const transaction = await client.authorizeNewTransaction(request);
Client-side vs server-side
A transaction should be created server-side instead of client-side, as
there are many reasons why a success message may never reach your server, leaving
you in a state where it’s unclear if your transaction has succeeded.Error handling
A few more errors can be caught that are related to Click to Pay.<SecureFields
...
onClickToPayError={(error) => console.error(error)}
/>
RETRIES_EXCEEDED - The user has exceeded the maximum number of retries filling in
their one-time password (OTP) and their profile is locked. An error message is also
displayed on the OTP component. It is recommended to hide the Click to Pay component
for the user at this point.CODE_INVALID - The user entered an incorrect OTP. An error message is also displayed
on the OTP component.INVALID_CARD - The user entered incorrect card details, or the details of a card that
is not one of the supported schemes.SIGN_OUT_FAILED - When attempting to sign out via the “Not you?” link it is possible
that Click to Pay is not able to sign out the user. It is recommended to hide
the Click to Pay component for the user at this point.ACCT_INACCESSIBLE - The user’s account is temporarily not accessible.USER_NOT_RECOGNIZED - The user is not recognized by Click to Pay (typically when a user
hasn’t signed in yet).UNKNOWN - An unknown error occurred. These are usually unrecoverable. For example, the
Click to Pay library was not initialized due to an invalid parameter.
Events
The following props can be used on the SecureFields component to listen to specific Click to Pay events.| Name | Event | Description |
|---|
onMethodChange | METHOD_CHANGE | Triggered when a user switches between the card and the Click to Pay payment methods. |
onClickToPayInitialized | CLICK_TO_PAY_INITIALIZED | Triggered when Click to Pay is loaded and its init method called successfully. |
onClickToPayReady | CLICK_TO_PAY_READY | Triggered when a Click to Pay user is identified correctly and can start using Click to Pay. |
onClickToPaySignOut | CLICK_TO_PAY_SIGN_OUT | Triggered when a Click to Pay user signs out using the “Not me” / “Not my cards” functionality. |
onClickToPayError | CLICK_TO_PAY_ERROR | See Error Handling |
onClickToPayCancel | CLICK_TO_PAY_CANCEL | Triggered when a Click to Pay user cancels the checkout process from within the UI. |
onClickToPayCheckoutWithNewCard | CLICK_TO_PAY_CHECKOUT_WITH_NEW_CARD | Triggered when a Click to Pay user starts the process of checking out with a new (not enrolled) card. |
onClickToPayUnableToLoadDpa | CLICK_TO_PAY_UNABLE_TO_LOAD_DPA | Triggered when the provided Click to Pay DPA cannot be loaded. |
onVisibilityChange to the ClickToPay, ClickToPaySignIn and CardForm
components to listen to visibility change events (CLICK_TO_PAY_VISIBILITY_CHANGE, CLICK_TO_PAY_CARD_FORM_VISIBILITY_CHANGE, CLICK_TO_PAY_SIGN_IN_VISIBILITY_CHANGE).<CardForm onVisibilityChange={(visible) => console.log('Card form visible', visible)} />
A few more errors can be caught that are related to Click to Pay.secureFields.addEventListener(
SecureFields.Events.CLICK_TO_PAY_ERROR,
({ error }) => console.log(error)
)
RETRIES_EXCEEDED - The user has exceeded the maximum number of retries filling in
their one-time password (OTP) and their profile is locked. An error message is also
displayed on the OTP component. It is recommended to hide the Click to Pay component
for the user at this point.CODE_INVALID - The user entered an incorrect OTP. An error message is also displayed
on the OTP component.INVALID_CARD - The user entered incorrect card details, or the details of a card that
is not one of the supported schemes.SIGN_OUT_FAILED - When attempting to sign out via the “Not you?” link it is possible
that Click to Pay is not able to sign out the user. It is recommended to hide
the Click to Pay component for the user at this point.ACCT_INACCESSIBLE - The user’s account is temporarily not accessible.USER_NOT_RECOGNIZED - The user is not recognized by Click to Pay (typically when a user
hasn’t signed in yet).UNKNOWN - An unknown error occurred. These are usually unrecoverable. For example, the
Click to Pay library was not initialized due to an invalid parameter.
Events
The following events can be listened to by attaching an event handler to the
SecureFields instance using the addEventListener method.| Name | Description |
|---|
METHOD_CHANGE | Triggered when a user switches between the card and the Click to Pay payment methods. |
CLICK_TO_PAY_INITIALIZED | Triggered when Click to Pay is loaded and its init method called successfully. |
CLICK_TO_PAY_READY | Triggered when a Click to Pay user is identified correctly and can start using Click to Pay. |
CLICK_TO_PAY_SIGN_OUT | Triggered when a Click to Pay user signs out using the “Not me” / “Not my cards” functionality. |
CLICK_TO_PAY_ERROR | See Error Handling |
CLICK_TO_PAY_CANCEL | Triggered when a Click to Pay user cancels the checkout process from within the UI. |
CLICK_TO_PAY_CHECKOUT_WITH_NEW_CARD | Triggered when a Click to Pay user starts the process of checking out with a new (not enrolled) card. |
CLICK_TO_PAY_UNABLE_TO_LOAD_DPA | Triggered when the provided Click to Pay DPA cannot be loaded. |
CLICK_TO_PAY_VISIBILITY_CHANGE | Triggered when the Click to Pay element is shown or hidden. |
CLICK_TO_PAY_CARD_FORM_VISIBILITY_CHANGE | Triggered when the card form container is shown or hidden. |
CLICK_TO_PAY_SIGN_IN_VISIBILITY_CHANGE | Triggered when the sign in container is shown or hidden. |
Links
Quick start: Secure fields
API Reference: New checkout session
API Reference: New transaction